
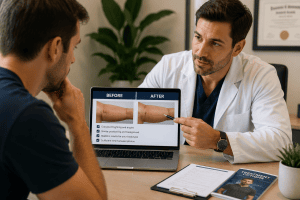
Before-and-after photos are one of the most common reference points in cosmetic procedure research, and one of the most frequently misread. The problem isn’t that they lie — though some do — it’s that most people don’t know what to look for when they look at them. Understanding the photographic, clinical, and contextual variables that affect what a before-and-after gallery shows changes how useful those photos actually are in the decision-making process.
The Photography Variables That Affect What You’re Seeing
Before you can evaluate what a before-and-after gallery is telling you about clinical outcomes, you need to understand what photography-specific variables can affect the appearance of the result independent of the treatment itself.
Lighting: The Most Powerful Variable
Lighting is the single most impactful variable in cosmetic before-and-after photography, and it’s the one most commonly exploited — whether intentionally or just carelessly — to make results appear more dramatic than they are. Direct, harsh lighting creates strong shadows that define contours and make volume differences appear more pronounced. Soft, diffused lighting reduces shadows and creates the appearance of evenness.
The clinical photo standard for before-and-after comparison requires consistent lighting between the before and after images. Both photos should be taken under the same light source, at the same intensity, from the same angle. When the “before” photo uses flat, even lighting and the “after” photo uses directional lighting that creates defining shadows, the apparent difference between the two is partly the treatment and partly the photography. A sophisticated gallery will have matching lighting across the comparison pair. A gallery where the before photos consistently look more “washed out” than the after photos warrants skepticism about whether the comparison is apples-to-apples.
Angle and Distance
Camera angle and distance from the subject produce changes in apparent size and proportion that are mathematically predictable. A lens positioned closer to an object and using a wider angle of view will make that object appear larger relative to surrounding anatomy than a lens positioned further away using a longer focal length at the same field of view. This is the same principle that makes a fish-eye lens distort faces to appear larger in the center of the frame.
For before-and-after comparison to be valid, the camera must be at the same distance, same height, and same angle for both photos. A patient photographed standing with the camera at waist height will appear different than the same patient photographed with the camera tilted slightly upward — the upward angle increases apparent length. A photo taken from closer distance with a wider lens makes the subject appear more prominent than the same photo taken from two feet further back with the lens zoomed in to fill the same frame. Both are common, often unintentional sources of misleading before-and-after comparisons.
Timing: When the After Photo Was Taken
Hyaluronic acid filler for girth enhancement doesn’t fully integrate and show its final result immediately. In the first few days post-procedure, swelling from the normal inflammatory response temporarily adds volume beyond what the filler itself contributes — the result in the first 24 to 72 hours is somewhat inflated relative to the settled result at two to four weeks. An “after” photo taken in this swelling window shows more volume than the patient will experience at six weeks when the result has fully settled and the temporary post-procedural swelling has resolved.
Conversely, a photo taken six to twelve months post-procedure may show some volume reduction from hyaluronidase-driven HA degradation that’s already begun. The timing of the “after” photo matters for interpreting what the result actually is. A credible provider will note when the after photos were taken relative to the procedure — “four weeks post” or “six months post” gives meaningful context. A gallery that simply shows before and after with no timing information is less informative than it appears.
“The question isn’t just ‘does this result look good’ — it’s ‘under what conditions was this photo taken, and are those conditions the same as the before photo?’ A result that looks impressive in the photo may look the same as the baseline under consistent conditions, or may be exactly as impressive as it looks. You can’t tell without knowing how the photo was taken.”
What a Credible Results Gallery Actually Shows
A provider’s before-and-after gallery for girth enhancement that’s genuinely informative has several characteristics that distinguish it from a gallery that’s optimized for impression rather than information.
Consistent Standardization Across All Pairs
Both photos in each pair should use the same background, the same lighting setup, the same camera distance, the same patient position (standing vs. sitting, angle relative to camera), and ideally the same camera and lens combination. This standardization isn’t just good practice — it’s the minimum requirement for the comparison to be clinically meaningful rather than photographic. Providers who have invested in a consistent clinical photography protocol typically show it throughout the gallery rather than case-by-case.
A Range of Results, Not Just the Best Cases
A gallery that shows only dramatic results from ideal candidates tells you something about what a procedure can do in the best case; it doesn’t tell you much about what you should expect as an average candidate. A credible gallery includes results across a range of starting anatomies and ending outcomes — some more dramatic, some more subtle — because that range reflects clinical reality across a patient population. A gallery where every result is dramatic and every before photo looks like the worst possible starting point is optimized for marketing rather than for honest patient education.
Clinical Context Alongside the Photography
The most informative before-and-after galleries include brief clinical context: the patient’s starting anatomy profile, the amount of filler used, the number of sessions, and the timing of the after photos. This context allows a prospective patient to identify cases that are most similar to their own anatomy and treatment goals, rather than comparing themselves to cases that are fundamentally different in starting position or treatment approach.
Realistic Expectations: The Correct Frame for This Whole Discussion
The reason evaluating before-and-after photos correctly matters is patient expectations. The leading driver of patient dissatisfaction with cosmetic procedures is not technical failure — it’s the gap between what the patient anticipated based on pre-procedure research and what the actual result provides. A patient who built their expectations on a gallery of highly selected, photographically favorable results from ideal candidates may have an objectively successful procedure that nonetheless feels disappointing because the expectation baseline was set too high.
The consultation is the right place to calibrate this. A provider who shows you the gallery, discusses the range of results including less dramatic outcomes, and specifically addresses what your starting anatomy and treatment goals would realistically achieve is giving you the information that allows genuine informed consent. A provider whose consultation is primarily a sales conversation anchored to the most impressive gallery cases is not setting you up for realistic expectations.
Lighting: are both photos in the comparison pair lit consistently? Watch for “before” photos with flat even lighting and “after” photos with shadows that define contours.
Angle and distance: same camera position, same height, same focal length? Small changes in angle and distance produce large changes in apparent proportion.
Timing: when was the “after” photo taken? First week results include temporary post-procedural swelling. Four to six week results reflect settled outcomes.
Gallery range: does the gallery show a range of results or only best-case examples? A range reflects honest clinical outcomes.
Clinical context: are procedure details (filler amount, sessions, timing) noted alongside the photos? Context allows meaningful comparison.
Red flags: photos where before/after conditions differ significantly in any of the above variables should be interpreted with appropriate skepticism.
For patients in the Dallas area who are beginning their evaluation process and want to understand both the technical picture and the broader options available in men’s wellness and enhancement, P-Shot and penile enhancement options in Dallas give context for the full range of non-surgical approaches. For the clinic’s approach to result documentation, patient transparency, and what a credible consultation looks like, the girth enlargement clinic is the right starting point.
Frequently Asked Questions
Can before-and-after photos for girth enhancement be misleading?
Yes — not always intentionally, but the photographic variables that affect how results appear (lighting, angle, distance, timing) can make the same result look different enough across before and after conditions that the comparison is partly a function of photography rather than purely the treatment outcome. The most common sources of misleading impression in before-and-after galleries are inconsistent lighting between the two photos (directional lighting in the “after” that emphasizes contours), camera angle or distance differences that change apparent proportion, and after photos taken during the post-procedural swelling window rather than after full settlement at four to six weeks. None of these are necessarily deliberate deception — many are just the result of inconsistent clinical photography practices — but they affect what the photos actually show.
What should I look for in a girth enhancement before-and-after gallery?
The markers of a credible, informative results gallery are: consistent lighting, camera angle, and distance between before and after photos in each pair; a range of results across the gallery rather than only the most dramatic outcomes; clear timing information for the after photos (four weeks, three months, etc.); and brief clinical context (filler amount, number of sessions) that allows you to identify cases most similar to your own situation. A gallery where every after photo looks dramatically better than every before photo, with lighting conditions that differ between the two, is optimized for marketing impression rather than honest patient education. The consultation with the provider is the most important information source beyond the gallery — what the provider says about realistic expectations for your specific anatomy is more informative than any number of gallery images.
How does lighting affect girth enhancement before-and-after photos?
Lighting affects the perceived volume, contour, and size of any photographed subject through shadow and highlight placement. Directional or harsh lighting creates defined shadows that make contours more prominent and volume more apparent — the same object photographed under directional lighting looks more three-dimensional and larger than the same object photographed under soft, even lighting. In a before-and-after comparison, if the “before” photo uses flat even lighting and the “after” photo uses directional lighting, part of the apparent difference between the two is attributable to lighting rather than to the treatment. A valid clinical comparison requires the same lighting setup for both photos. This standard is not universally observed in cosmetic before-and-after photography, which is why evaluating lighting consistency is the first thing an informed patient should assess in any results gallery.
How soon after girth enhancement can you see the final result?
The final, settled result of HA filler-based girth enhancement is typically visible at approximately four to six weeks post-procedure, after the normal post-procedural swelling has fully resolved and the filler has integrated with the surrounding tissue. In the first 24 to 72 hours post-procedure, temporary swelling from the inflammatory response adds volume beyond the filler’s contribution — results during this early window are somewhat larger than the settled final result. A photo taken in the first week post-procedure represents the swelling-influenced result rather than the stable long-term outcome. An after photo taken at four weeks or beyond represents the actual settled result. When evaluating provider galleries, noting when after photos were taken relative to the procedure is important context for interpreting what the photos actually show.
Should before-and-after photos be the primary basis for choosing a provider?
No — and relying primarily on before-and-after photos to choose a provider is one of the common mistakes in cosmetic procedure research. The gallery shows results from cases the provider has selected to display; it doesn’t represent the full range of outcomes, it doesn’t reveal technique, it doesn’t reflect how the provider communicates, and it doesn’t show the cases that didn’t meet the provider’s standard for gallery inclusion. The consultation is the most informative selection tool — how the provider assesses your specific anatomy, explains realistic outcomes for your situation, handles your questions, and discusses the range of results including less dramatic ones tells you more about whether this provider is right for you than any number of gallery images. The gallery is useful context and a starting point; the consultation is the actual evaluation.
What is the difference between realistic and unrealistic expectations for girth enhancement?
Realistic expectations for HA filler-based girth enhancement are calibrated to what the procedure reliably achieves across a range of patients: a meaningful, visible increase in circumference that is natural-looking and proportionate to the individual’s anatomy, maintained for 12 to 18 months before requiring maintenance. Unrealistic expectations are calibrated to the most dramatic results in a provider’s gallery — which represent ideal cases with optimal anatomy, optimal filler placement, and optimal photography — applied to one’s own situation without accounting for whether those conditions are comparable. The consultation is specifically designed to bridge this gap: a provider who assesses your anatomy and tells you what a realistic outcome looks like for your specific situation is setting expectations that the procedure can meet. A patient whose expectations are built on the gallery’s most impressive cases without that individualized calibration is the patient most likely to experience the disappointment of an objectively successful procedure that nonetheless falls short of what they anticipated.